Ideas for Decorating with Plants

At the mention of interior design, the first things that often come to mind are furniture, wall art, paint colors, and other material components. However, plants are an important décor element that have the power to refresh the look and feel of any indoor space, while making your home eco-friendlier. Keep the following tips in mind when decorating your home with plants.


Consider Your Space

Before you make a trip to the nursery, think about which spaces in your home are best suited for plants. It’s also important to research the needs of the plant varieties you’re considering. By knowing how much shade and direct sunlight they need, you’ll be able to identify the best home for each plant type and the care they need to grow.


Go Vertical

Empty vertical wall spaces provide the perfect opportunity to incorporate hanging plants. Whether you use planters or install shelving, hanging plants attract the eye and bring an organic, living element to what was previously a blank canvas. Hanging herb gardens are a wonderful addition to the kitchen, allowing you to keep fresh ingredients and flavors out in the open air and within reach at all times.


Floor Plants

Floor plants are typically large and require plenty of space. Due to their size, they are often used to balance the proportion of rooms containing large furniture items like couches, desks, and tables. Common floor plants include the fishtail palm, olive trees, the rubber plant, fiddle leaf fig, and bird of paradise.


Low Maintenance Plants

For those who don’t consider themselves to be green thumbs, cacti and succulents are the way to go. Most succulents come from hot climates with little humidity and have thick tissue that stores water for long periods. Accordingly, they are lower maintenance than most other plants and require little watering.


Decorate with Terrariums

Another creative, relatively low-maintenance option for indoor gardeners is a terrarium. Terrariums are contained indoor gardens, usually in a glass container that can be left either sealed or open. Closed terrariums are self-nourishing, creating their own water cycle. Plants that grow in humid conditions are best suited for this environment. Open terrariums provide a good home for plants that need less water, like cacti and succulents. Terrariums make for eye-catching décor, with styles ranging from minimalistic to intricate.


For more information on home design and the latest trends, check out our tips on how to upgrade your bedroomhome office, and kitchen, as well as the 2021 paint color trends and principles of timeless home design.

The post Ideas for Decorating with Plants appeared first on Windermere Colorado REALTORS.

7 Ideas for Creating a Beautiful Yard

1. Remodel Your Patio

The best patios are durable and long-lasting. If your patio requires repair, a remodel can play a significant role in creating the beautiful backyard you envision. Think about how your patio will be used before choosing materials. For example, if you plan on using it as a dining area, an uneven material like cobblestone may not be the best choice. Design your new patio pattern, including gaps between pavers for loose materials, before getting started.


2. Upgrade Your Deck

Decks can often be the focal point of a backyard. A few upgrades can easily transform the look and feel of the space. If you are building a new deck, take your local climate into account when deciding on materials. To upgrade your existing deck, create a seating area using chairs or a bench and decorate the area with plants to make it feel more welcoming. Pergolas and patio umbrellas will help to keep the area shady and cool while adding some color to the space. If you are rebuilding, consider building in seating during construction.


3. Start a Vegetable Garden

Gardens don’t just pop up in your backyard overnight, they take time to grow. Start by building your garden beds, aligning them north to south for maximum sunlight. Choose an area of your backyard where your veggies will have direct access to sunlight, without being blocked by shade from trees and shrubs. Research your local climate to determine which vegetables you should grow and what kind of yield you can expect. To protect your garden from weeds, insert a barrier in the bottom of the beds.


4. Edge Your Walkways

Nothing catches the eye in the garden like clean, crisp edging. Edging comes in a variety of materials, from plastic to more durable options like aluminum or steel. Before you install the edging, use a lawn edger or spade to make the cuts and shape the pattern. Tap the edging it into the ground with a mallet to solidify it into the ground and to protect it from animals.


5. Add Landscape Lighting

A beautiful backyard deserves to be enjoyed around the clock. Landscaping lighting can extend those days spent in the yard well into the nighttime. There is an array of landscaping lighting options to choose from, including spotlights, floodlights, in-ground lighting, outdoor post lights, and more. Choose the one that best highlights the features of your yard.


6. Install a Fire Pit

Fire pits help to tie a backyard together. The style of your fire pit should match other features in your backyard to bring cohesiveness to the space. Traditional fire pits are usually accompanied by circular seating, while more modern options like fire troughs provide a centerpiece to take in surrounding views. Wood fire pits provide a classic, crackling environment, gas pits burn cleaner than wood and come with an on-off switch, while gel-powered fire pits create a smaller frame and are typically used for accent lighting.


7. Add Garden Containers

Garden containers of all shapes and sizes can be very useful in the yard, especially for homeowners with limited garden space. By adding pots, wooden boxes, or bowls to your yard, you’ll provide a flexible home for a variety of plant life. Just make sure each container has proper drainage holes. If not, you’ll need to make the holes yourself, or you can opt for self-watering pots.

The post 7 Ideas for Creating a Beautiful Yard appeared first on Windermere Colorado REALTORS.

Simple Bathroom Upgrades

The thought of upgrading a bathroom often brings to mind large-scale renovations, demolition, and hefty price tags. Even projects like replacing a backsplash or repairing tile can be more involved than you might think. However, it’s possible to give your bathroom a makeover without breaking the bank (or your back). Whether you’re looking to just freshen it up or make it feel like your own personal spa, these simple projects can help take your bathroom to the next level.

Upgrade your Décor

If you want to make a big splash without spending big money, consider upgrading your bathroom with new décor. A fresh coat of paint on the walls or a bold, patterned wallpaper can completely change the character of the space, while accent pieces like a new shower curtain and towel racks can reinforce your color choices. Installing shelving is a simple, functional tactic that gives dimension to your walls. Whether it’s in the shower, above your toilet, or beside your vanity, a shelf can save surface space while helping to tie the room together.

Upgrade your Tub

Upgrading your tub doesn’t have to mean buying a replacement. Simply refinishing your tub will have it looking brand new and helps you save money. Over time, tubs accumulate cracks, dings, and discoloration due to mold, but refinishing can cure these imperfections right away. Start by removing all hardware from the tub. Sand the whole surface, fill in any cracks or holes with putty or epoxy, then sand them smooth. Apply multiple layers of primer and topcoat, give it a buff, and enjoy your brand-new bathtub.

If refinishing your tub is too much to handle, consider simply touching it up. Fill in any cracks and apply a fresh line of caulking around the surface. After this is done, shop around for new tub hardware to polish off your cost-effective bathtub makeover.

Upgrade Your Vanity

With just a few tweaks, you can turn your vanity area from a mirror with counter space to an impactful centerpiece. Instead of going all out with a new cabinet install, simply replacing your cabinet hardware and drawer pulls can make a big difference. Think of ways your new hardware can reinforce the style of your bathroom. Match them with your shower rod, faucet, and showerhead to make your bathroom more eye-catching.

Your vanity also offers a great opportunity to add some color to your bathroom. Giving it a fresh coat of paint will help to liven up the space at a low cost. For wooden vanities, a re-stain is a great way to give them new life. Start by removing the doors and drawers. Apply wood stripping to all surfaces, then let them sit for the recommended time. Now you can begin to scrape away the old finish. Sand down all surfaces and apply the primer before staining the wood. Once your stain settles in, apply a second coat and your vanity will be good as new.

Finishing Touches

Well-organized surfaces and compartments will help to create serenity in your bathroom. Whether it’s in the shower, the medicine cabinet, or below the vanity, look for multipurpose organizers that help cut down on bathroom clutter and save space. Add in natural elements like bamboo and river rocks to make your bathroom feel like a soothing sanctuary.


For more ideas on affordable home makeovers, check out our tips for upgrading your bedroomhome office, and kitchen.

The post Simple Bathroom Upgrades appeared first on Windermere Colorado REALTORS.
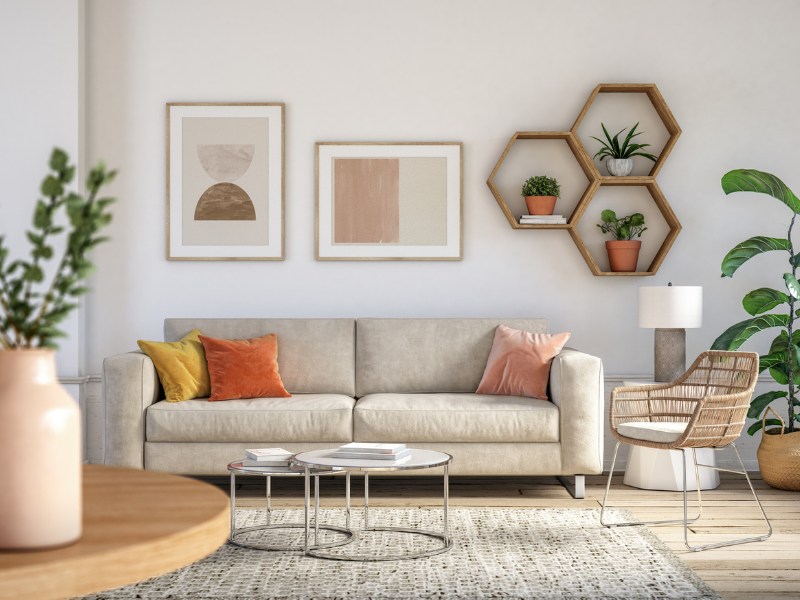

DIY Remodeling vs Professional Remodeling

Deciding whether to DIY a remodeling project or leave it to a professional is a matter of weighing the risks and rewards, time, and budget. Before you start applying a new coat of paint or go about knocking down a wall, create a plan for your remodel to help you decide which projects you can handle, and which ones belong in the hands of a pro.

Create Your Remodeling Plan

Knowing your plans for your remodel will help to determine your timeline and budget, which will inform your DIY-vs-Pro decision-making. Set specific goals for each project so you’ll know when you’re getting off track but remain flexible in your planning to leave room for any unexpected hurdles that will inevitably pop up in the remodeling process. Your budget will also help you decide who should execute certain projects. For example, if you’re budgeting more for a kitchen remodel than any other project, that is a likely candidate for professional help.

If you’re having trouble deciding the best route to take with your remodeling projects, ask yourself the following questions:

  • What risks am I comfortable taking on?
  • How much time am I willing to dedicate to this project?
  • Does this project require a permit?
  • Do I have any experience with this kind of remodel?
  • Am I comfortable giving up control of this project?


DIY Remodeling Pros and Cons

Pros: Taking a DIY approach to remodeling projects pays dividends in many ways. Without having to pay labor costs, you stand to save significant money by tackling a project on your own. Going DIY also allows you to set your own schedule for the project. And of course, the sense of ownership and pride you will feel knowing you completed the project on your own is a priceless feeling for a homeowner.

Cons: DIY projects can be consequential. Mistakes at any point in the renovation process can lead to greater costs and sometimes, hiring a professional to fix the mistake. Unfortunately, this can result in the loss of significant time and money.


Professional Remodeling Pros and Cons

Pros: Professionals are inherently more experienced, bringing their specialization to the table on every home renovation project, so you can expect them to perform high-quality work that will increase the value of your home.

Cons: Getting professional quality work means paying for it. When budgeting, expect higher costs for any project you’re thinking of outsourcing to a pro. Bear in mind that, especially for large-scale renovation projects, your home will become a construction site. Accordingly, you may need a back-up plan, such as a temporary kitchen set-up or a short-term rental home .


DIY Remodeling vs Professional Remodeling: Around the House

The following list breaks down which projects are typical DIY candidates and which ones homeowners commonly opt for professional help to complete. However, the decision is ultimately up to you. If you have your heart on tackling a project on your own, gather your tools and make it happen!

Kitchen

  • Professional: Any large-scale structural changes, new gas lines, or new plumbing projects should be handled by a professional.
  • DIY: Simpler kitchen projects like a backsplash or faucet replacement and any cabinet finishing tasks are perfect DIY candidates.

Bathroom

  • Professional: Plumbing installation, running electricity, or any projects involving an expansion or alteration to your bathroom structure.
  • DIY: If your bathroom is simply in need of some new tile work, basic medicine cabinet restoration, or minor flooring improvements, roll up your sleeves and DIY.

Backyard

  • Professional: Consider hiring a professional for any significant outdoor projects like concrete builds, in-ground pools, and technical deck work.
  • DIY: Common backyard DIY projects include building a garden tool shed, building a fence, and refinishing a deck.

General

  • Professional: It is best to hire pros for new roofing, any foundation work, and extensive demolition projects. For asbestos and drywall finishing, it’s easiest, and safest, to go with the pros.
  • DIY: Any interior painting projects, basic electrical work, or simple trim and door upgrades.

If you’re planning on going through a remodel while you live at home, read this first. For more information on how certain renovations may impact the value of your home, talk to your Windermere agent.

The post DIY Remodeling vs Professional Remodeling appeared first on Windermere Colorado REALTORS.


2021 Paint Color Trends

Living Room

Embrace neutral colors

After a weary 2020, expect to see a return to prominence for nostalgic, neutral colors. The resurgence of neutrals signals a focus on simple comfort, healing, a return towards wellness, and is representative of a lifestyle with a slower pace. Colors to look for include oatmeal hues, cerulean and Aegean blues, and earthy tones.

Comforting colors

More than ever we are looking to our homes to provide us the chance to relax and recharge. Accordingly, serene, warm colors and soft pastels are making a strong comeback. They set the mood by providing a calm foundation, leaving room to add colorful decorations. Keep your eye out for rejuvenating colors including soft reds and creamy off-whites.

Add vibrance

To build upon your neutral palette, add touches of vibrant colors for an exciting contrast. This coming spring, you can expect to see nature-based hues on the rise. In 2021, these nature colors will reflect a return to vibrance after homeowners have spent most of 2020—and, in some places, remain—cooped up due to the COVID-19 pandemic. Colors to look for include rust tones and hues in the gold-to-orange range.

Color trends in your home

The calm, soothing presence of neutrals is best delivered when given ample space, so look to use the neutral palette on large surface areas. Good use cases in your home include painting whole walls, as well as furniture and carpeting choices. For vibrant colors, sprinkle them throughout the home in your décor and through smaller accents.

60-30-10 Rule

After you’ve chosen your colors, follow the 60-30-10 color design rule. It states that 60% of a room’s color should be the dominant color, 30% should be the secondary color, and 10% should be the accent color.


2021 Paint Colors

 Here are three 2021 paint colors that will deliver the serene home environment you’re looking for while providing a solid foundation to add decorations.

Aegean Teal

Benjamin Moore’s 2021 color of the year is Aegean Teal. It combines a calming blue, a natural green, and a soothing grey. Its qualities make it a sound choice for bedroom or living room walls, as well as cabinets and other large surface areas. Aegean Teal is the perfect choice for homeowners looking to incorporate a bluish hue into their home without the melancholy undertones that come with blue.

Urbane Bronze

Say hello to Urbane Bronze—Sherwin Williams’ 2021 color of the year. Their selection is founded in the desire to create a sense of calm at home. Urbane Bronze helps to deliver the sense of a sanctuary at home, given its organic appeal. Use this color to give your home a relaxed feel by painting your trim or accent walls. Urbane Bronze pairs nicely with greys and modern greens.

Big Cypress

PPG has selected Big Cypress as part of their “Be Well” 2021 Palette of the Year. This ginger orange pairs well with cherry and mahogany woods, as well as touches of gold. Homeowners looking to create a soothing feeling without missing a sense of warmth can depend on Big Cypress to do the job. Another earthy tone, this color is the perfect choice to create what PPG calls a “huggable” room.


2020 has been a unique year, changing how we perceive and live in our homes. The new year presents an opportunity for a fresh start, so consider exploring these colors and trends to find the right combination for your home in 2021.

The post 2021 Paint Color Trends appeared first on Windermere Colorado REALTORS.

Remodeling Impact

Remodel

Americans spend $400 billion per year remodeling their homes.

So, which remodeling investment gives the best return when it comes to resale value?

It should come as no surprise, especially leading up to Thanksgiving, that the best money to spend upgrading your home is in the kitchen.

It’s the place where most homeowners spend most of their waking hours.

According to the research from the National Association of Realtors, it’s where remodelers will see the biggest return on investment.

Here is the ranking of various projects in terms of the value it adds to the home:

  1. Complete kitchen remodel
  2. Kitchen upgrade
  3. HVAC replacement
  4. Owner’s suite renovation
  5. Bathroom renovation
  6. Finishing a basement
  7. Adding a bathroom

The post Remodeling Impact appeared first on Windermere Colorado REALTORS.

Protecting Your Home’s Air Quality

Pollution

Image Source: Canva

Most of us tend to think of air pollution as something that occurs outdoors where car exhaust and factory fumes proliferate, but there’s such a thing as indoor air pollution, too. Since the 1950s, the number of synthetic chemicals used in home products have increased drastically, while homes have become much tighter and better insulated. As a result, the EPA estimates that Americans, on average, spend approximately 90 percent of their time indoors, where the concentrations of some pollutants are often two to five times higher than typical outdoor concentrations. 

Luckily, there are many ways to reduce indoor air pollution. We all know that buying organic and natural home materials and cleaning supplies can improve the air quality in our homes, but there are several other measures you can take as well. 


How pollutants get into our homes 

Potentially toxic ingredients are found in many materials throughout the home, and they leach out into the air as Volatile Organic Compounds, or VOCs. If you open a can of paint, you can probably smell those VOCs. Mold is a VOC that can build up in the dampest parts of your home like the laundry room or crawl spaces. Another example is the “new car smell” that seems to dissipate after a while, but VOCs can “off-gas” for a long time, even after a noticeable smell is gone. 

Many materials used to build a home contain chemicals like formaldehydetoluene, xylene, ethanol, and acetone, and even lead. VOCs can also be in the form of pet dander or dust. Fortunately, VOCs from building materials dissipate over time. For that reason, the highest levels of VOCs are usually found in new homes or remodels. If you are concerned about VOCs, there are several products you can buy that are either low- or no-VOC. You can also have your home professionally tested. 


How to reduce VOCs in your home 

Choose your building materials wisely  

  • – Use tile or solid wood for flooring—hardwood, bamboo, or cork
  • – Choose solid wood or outdoor-quality plywood that uses a less toxic form of formaldehyde. 
  • – Choose low-VOC or VOC-free paints and finishes 

Purify the air  

  • – Make sure your rooms have adequate ventilation, air out newly renovated areas for at least a week 
  • – Clean ductwork and furnace filters regularly 
  • – Install air cleaners if needed 
  • – Use only environmentally responsible cleaning chemicals 
  • – Plants are a natural solution to help clean the air 
  • – Air out freshly dry-cleaned clothes or choose a “green” cleaner 

Pick the right carpet 

  • – Choose “Green Label” carpeting or a natural fiber such as wool or sisal
  • – Use nails instead of glue to secure carpet 
  • – Install carpet LAST after completing painting projects or wall coverings
  • – Air out newly carpeted areas before using  
  • – Use a HEPA vacuum or a central vac system that vents outdoors
  •  

Prevent mold  

  • – Clean up water leaks fast 
  • – Keep humidity below 60 percent, using dehumidifiers if necessary 
  • – Refrain from carpeting rooms that stay damp 
  • – Insulate pipes, crawl spaces, and windows to eliminate condensation 
  • – Use one-half cup of bleach per gallon of water to kill mold in its early stages 

If you would like to learn more about VOCs and indoor air quality, please visit http://www.epa.gov/iaq/ 

The post Protecting Your Home’s Air Quality appeared first on Windermere Colorado REALTORS.